There were three different images which
were used to get know the Photoshop software. The below three sections have put
through to describe how the images were edited from the original photo. The
three pictures were desert, Ian Mckellen and a teenage girl face.
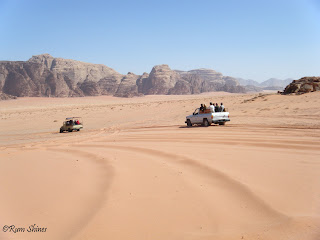
1. Desert
Before
After
What?
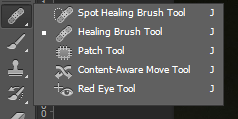
We learned patch tool which deletes the objects in one image such as
mobile, cars and people.
Where?
It was in the class with everyone.
Who and When?
This picture was edited when Jamie was demonstrating about Photoshop’s
patch tool .
Why?
To learn how to delete an object within the image this can be anything
such as car for this practice. Moreover this practice was important as for our
DVD cover and the CD cover. This is because covers will be involving pictures from
internet which we might need some parts of it and patch tool is the best tool
for this as it can remove the exact object we want.
How?
Firstly we got the picture from VLE
and as a practice we wanted to delete the car on the left. Secondly, we used
the patch tool which can be accessed by just clicking (J) and it is located at
the 7th icon down in the left banner on the screen. As the left car
needed to be deleted we went around it including its shadow. This however gave
us an object which can be drag and be replaced with the other part of the whole
image. For example the car was an object in the desert image and the area
around it had desert which looked very similar so the car object was just moved
towards the left so the tool can replicate the area on the car. The result
shows in the ‘after’ image at the top that the car from the original image has
been taken out but still the image looks untouched.
2.
Ian Mckellen
Before
After
What?
We learned about healing
tool which is located in the pact tool (J)
Where?
In class with everyone after the desert picture.
Who and When?
This picture was edited when Jamie was
demonstrating about Photoshop’s patch tool in which we had to use healing
feature for Ian image.
Why?
To learn how to delete all the marks on the face of
a person i.e. making an old person look a bit younger by fixing all the
wrinkles on their face. This again is a very useful tool to my project as if
there are any pictures which involves any face edition for my actors as healing
tool does not only make someone look younger but also edits any kind of spots
or marks which appear on the face. This however makes the face more like a
model and for this reason it is called healing tool.
How
The first process i.e. the location of the image
was same as the desert picture which is VLE. Once the picture was saved to our
area or any of the devices we imported to Photoshop which meant we didn’t had
to fiddle about with the settings of the page i.e. width and the height.
Thirdly, using the path tool (J) for keyboard shortcut in which it had another
feature which was called healing tool. This however helped me to edit all the
marks and wrinkle on the face of Ian. The process was by clicking alt on
keyboard which gives a selection tool to select the area which you want to copy
and paste it after. After this you go over the marks with the mouse which
generates the area which you selected previously using the alt key. It took
long time for me to do as there were many marks but at the end the result was
good and you can see it in the after picture.
3. Teenage girl
Before
After
What?
We learned about spot
healing brush tool which is located in the pact tool (J).
Where?
In class with everyone
after the Ian picture.
Who and When?
This picture was edited when
Jamie was demonstrating about Photoshop’s patch tool in which we had to use spot
healing feature for young girl.
Why?
To learn how to delete
all the marks on the face of a person i.e. making an old person look a bit
younger by fixing all the wrinkles on their face. This again is a very useful
tool to my project as if there are any pictures which involves any face edition
for my actors as healing tool does not only make someone look younger but also
edits any kind of spots or marks which appear on the face. This however makes
the face more like a model and for this reason it is called healing tool.
To learn how to delete
the spots on the face of the person i.e. making the face look like a model.
Alongside the healing tool this spot healing tool is also useful as it is
specially designed to fix all the spots which a person has on their face. This
is indeed very useful as for media purpose, there is a need of attraction at
eye catching as many people will be looking at the images over internet,
newspapers etc. therefore the masses would not like if the image contains any
marks or wrinkles as this would be classed as unprofessional.
How?
The
first process started by importing the image from the folder which I saved the
others i.e. desert and Ian image. As soon as we opened the image we used the
spot healing feature in patch tool. Secondly, we were trying to delete all the
marks and spots which were easily to be seen as this would make my work easier
as the bigger work been done on the image and what I will be left with are
those which are very hard to see. Therefore to get all the small marks off from
the face of this young teenage girl we had to zoom in from the original image
and using the spot healing brush we had to right click from the mouse on the spot
or the marks after choosing spot healing brush. This however made all the spots
and marks disable. There were loads of marks and few spots on the face of the
young girl however the spot healing tool made it very easier and after all the
hard work the result came that most of the face looked like a model face. The
result you will be able to see in the before and after image.